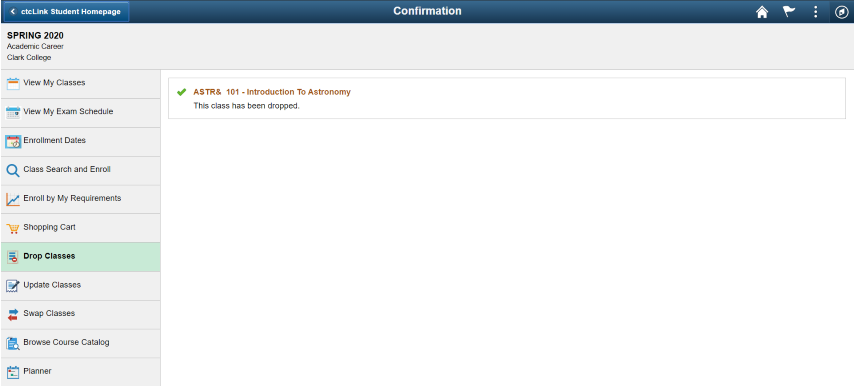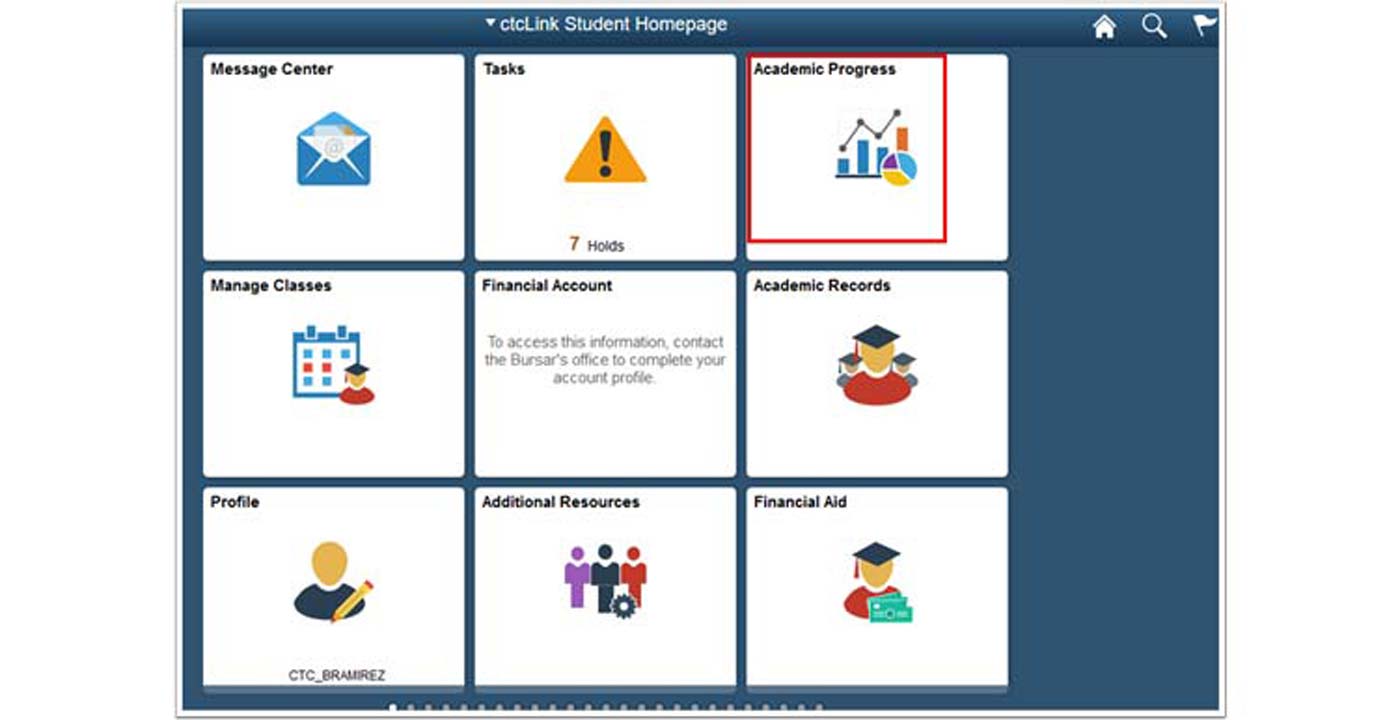

Student Tutorials
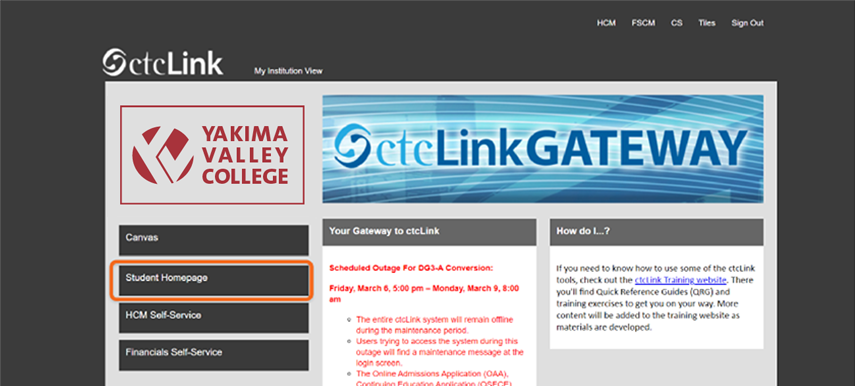
ctcLink is YVC’s self-service portal that allows you to manage your college business online including enrolling in classes, viewing your degree pathway, checking your financial records and aid, paying tuition, and more! Get started by activating your ctcLink account!
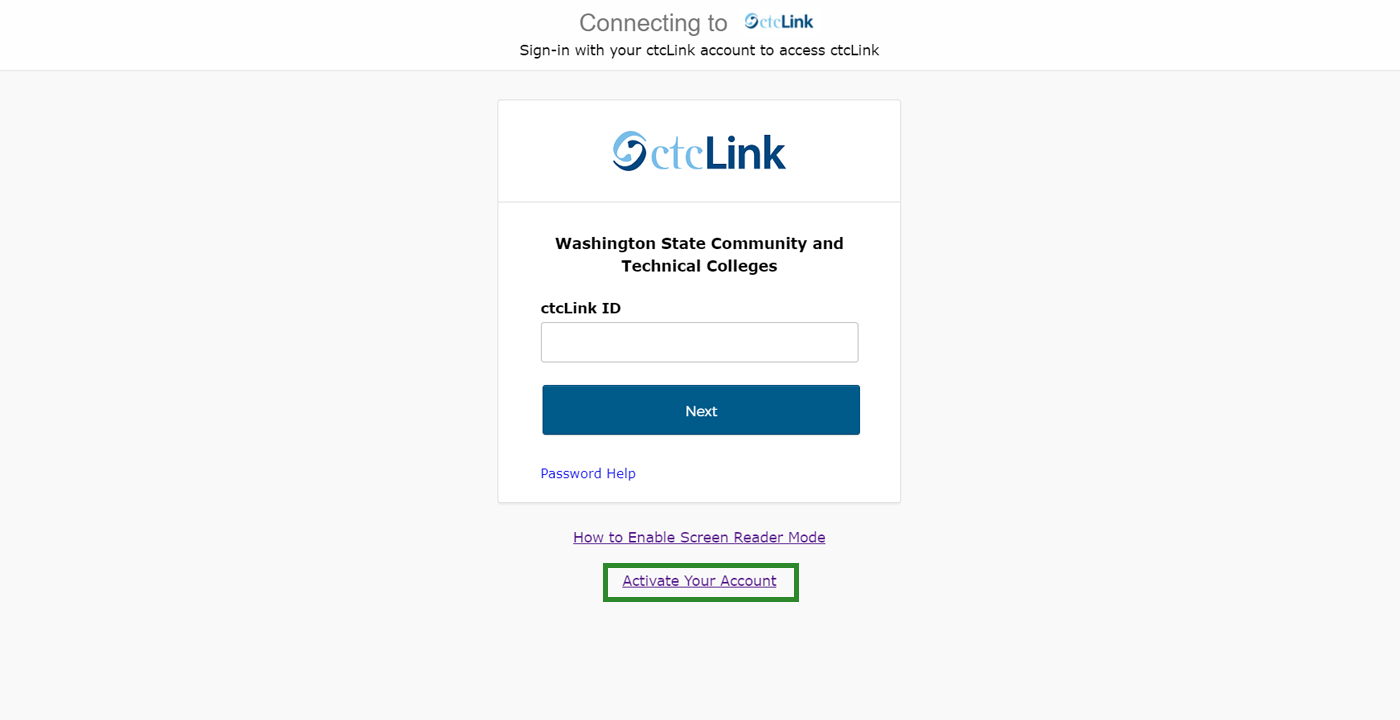
Activate Your Account
You must use the Full Site to activate your ctcLink account. Once you have activated your ctcLink account, you can use a free app on your mobile device or this user-friendly desktop version of the mobile site.
- If you have already received a ctcLink ID number from another college and activated your account with them:
- You do not need to activate your account again or receive a new number
- Use your existing number
How to Activate Your Account and More Tutorials
Before you start, please watch this short how-to video on activating for students. (Courtesy of Seattle Colleges.)
ctcLink ID vs student email
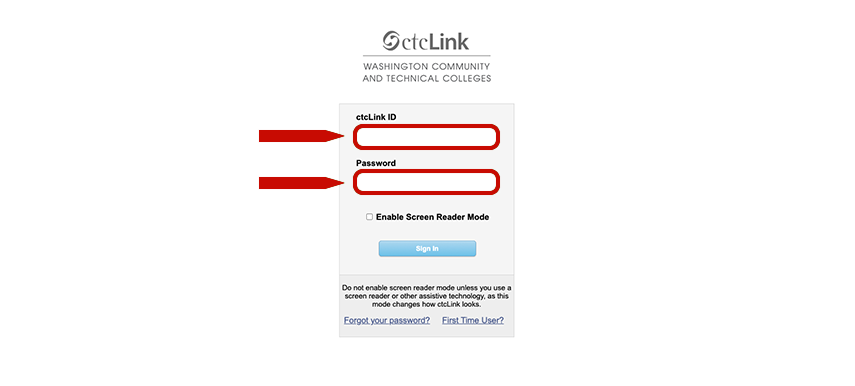
What do I use to log in?
Student Logins


Example Student
Name: Daisy Duck
Email: DADuck356@student.yvcc.edu
ctcLink Student ID: 1010498875
Username: DADuck356
Password: Password!
PIN: 40783
Example: PIN# 40783
PIN is set to your date of birth. Jan.-Sept. do not use a zero before the month, mm/dd/yy, April 7, 1983 the PIN = 40783
ctcLink Account Setup
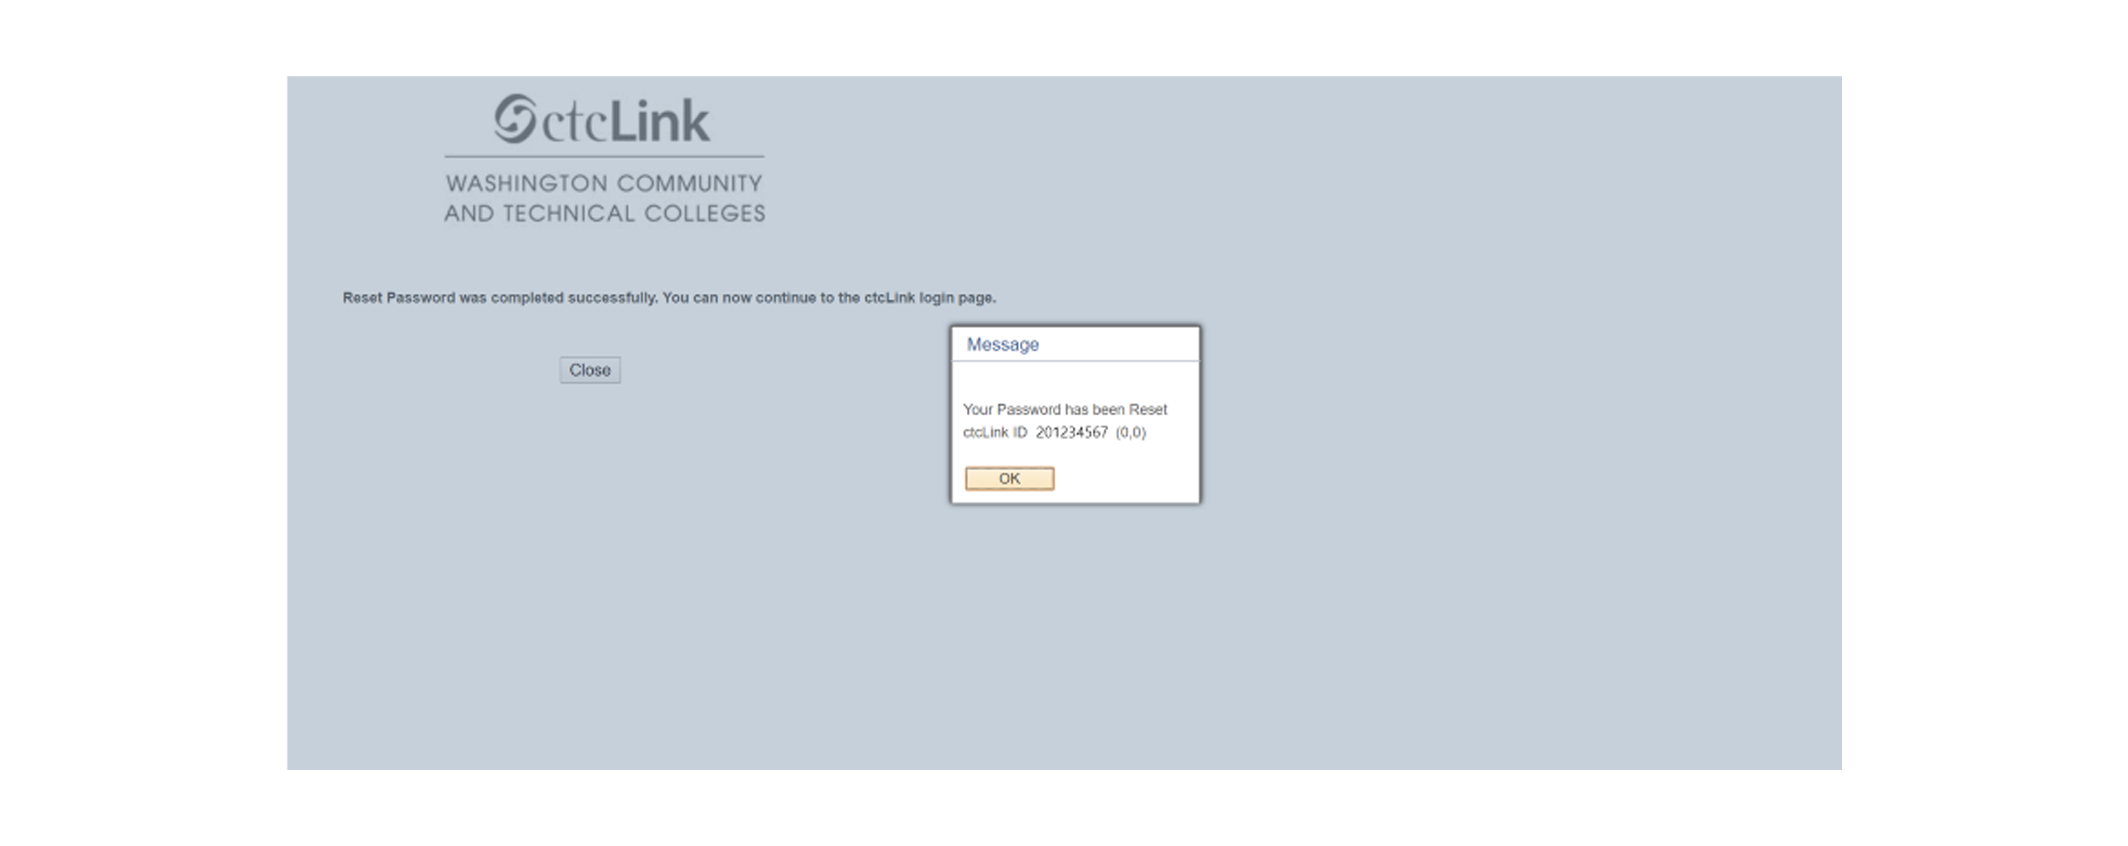
Activate your ctcLink Account
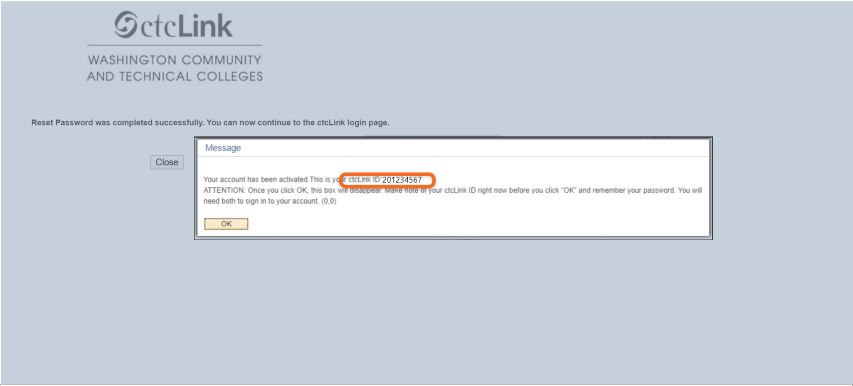
When you activate your account, you will be assigned a ctcLink ID number (called EMPLID in the new system) and you will need to create a password. Be sure to write down your new number when you get it and keep it in a safe place.
You can locate your new EMPLID here: ctcLink User ID (EMPLID) Lookup
If you activated your account and did not write down your new ctcLink ID, see the recovery instructions in this section of tutorials.

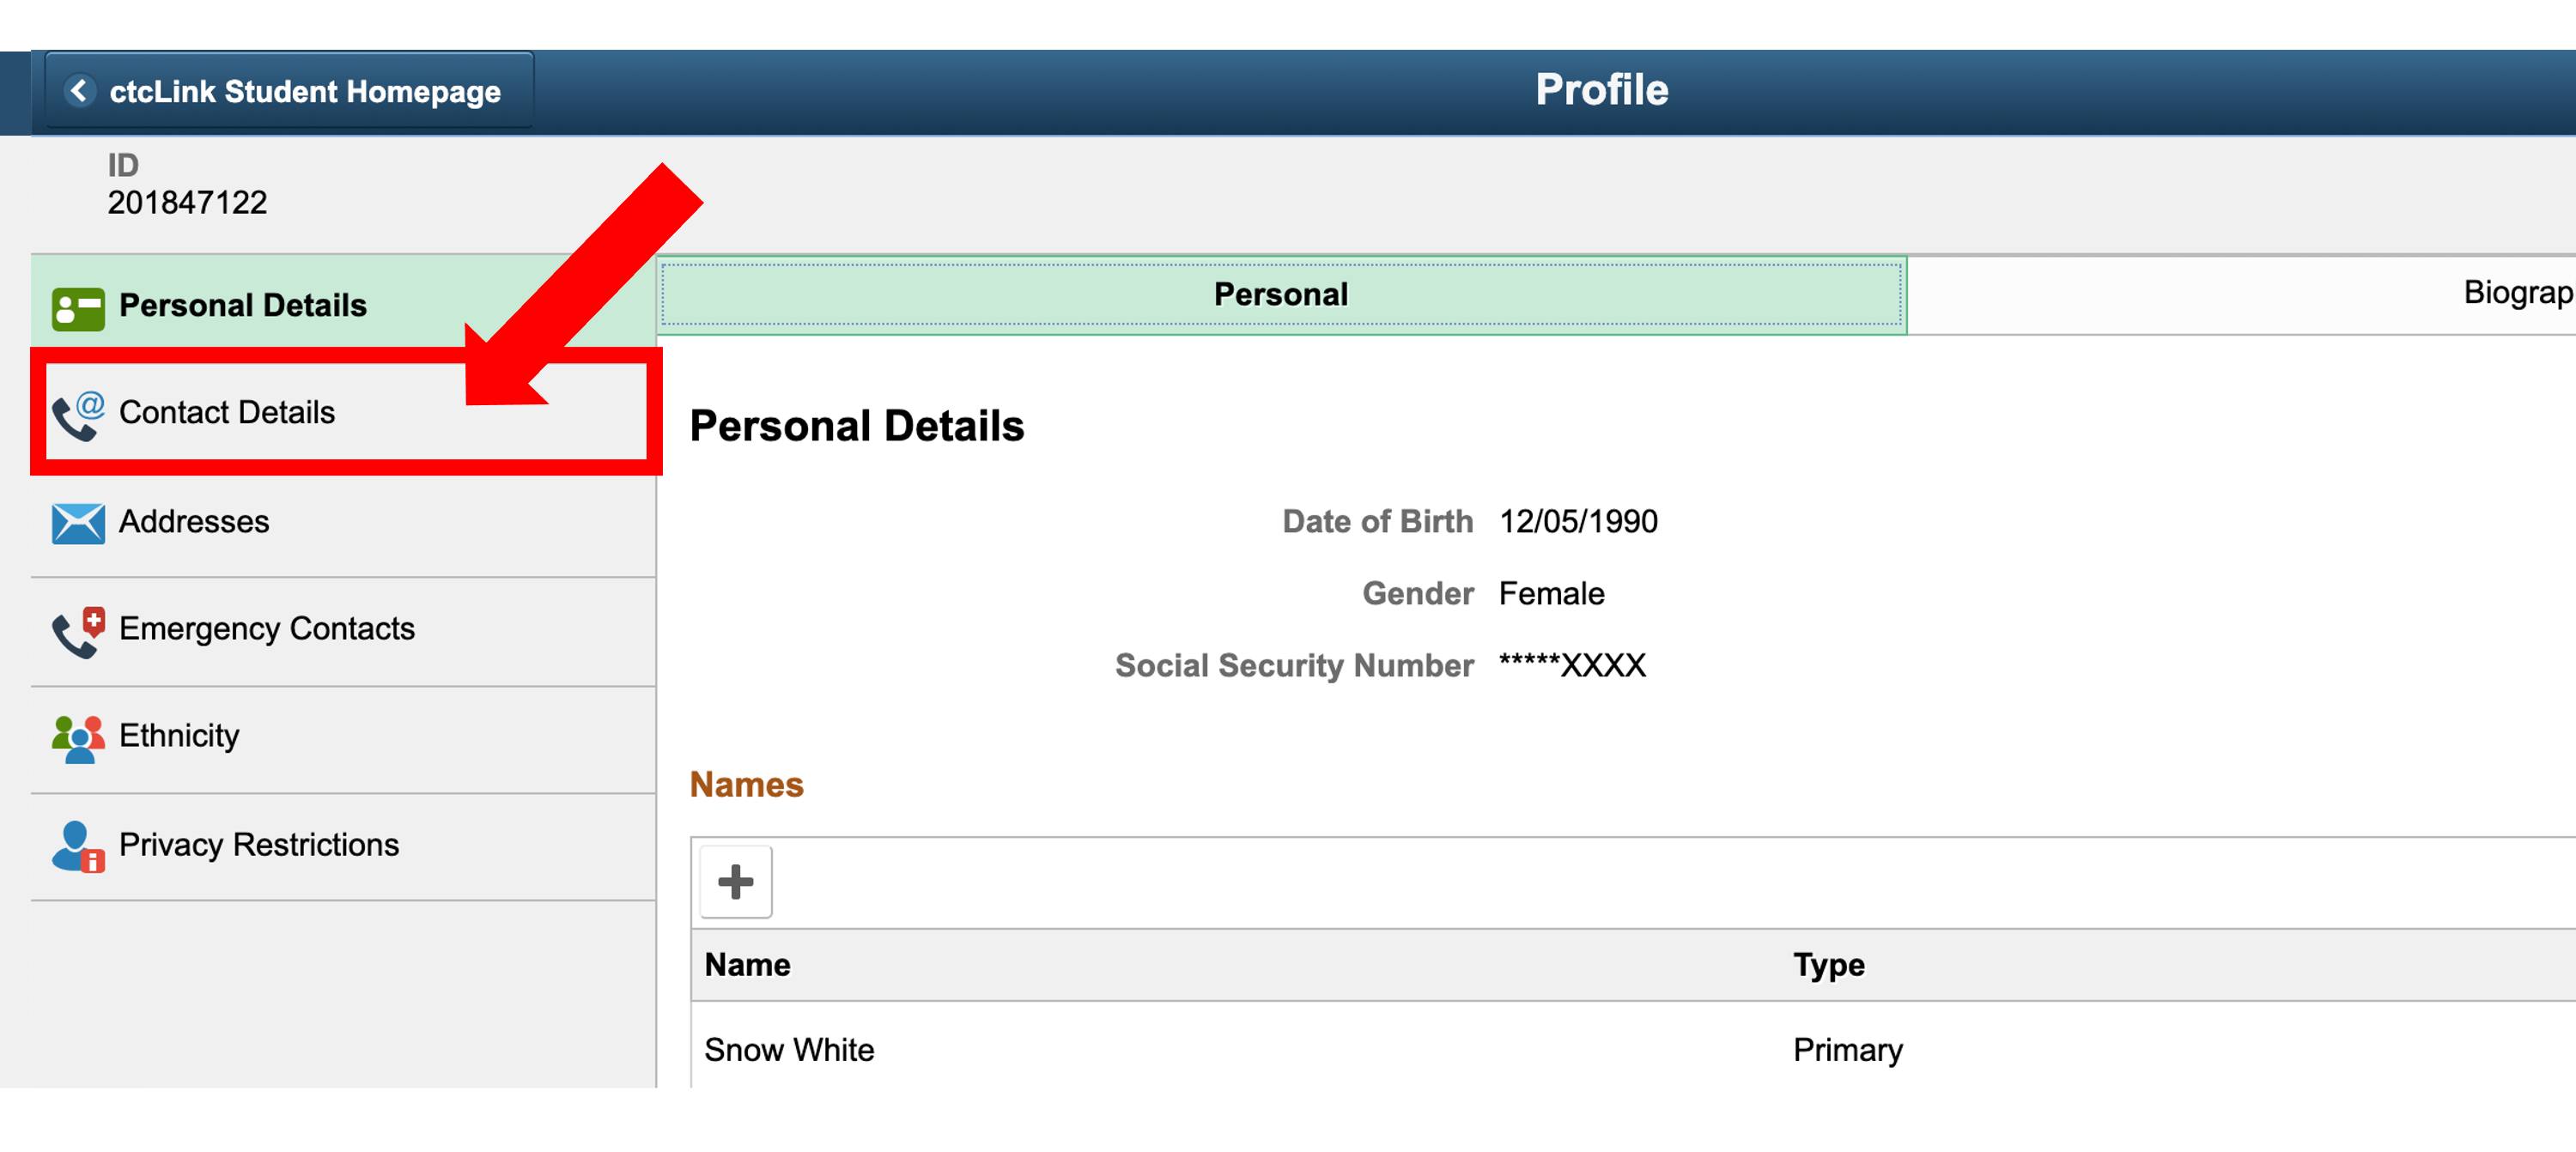
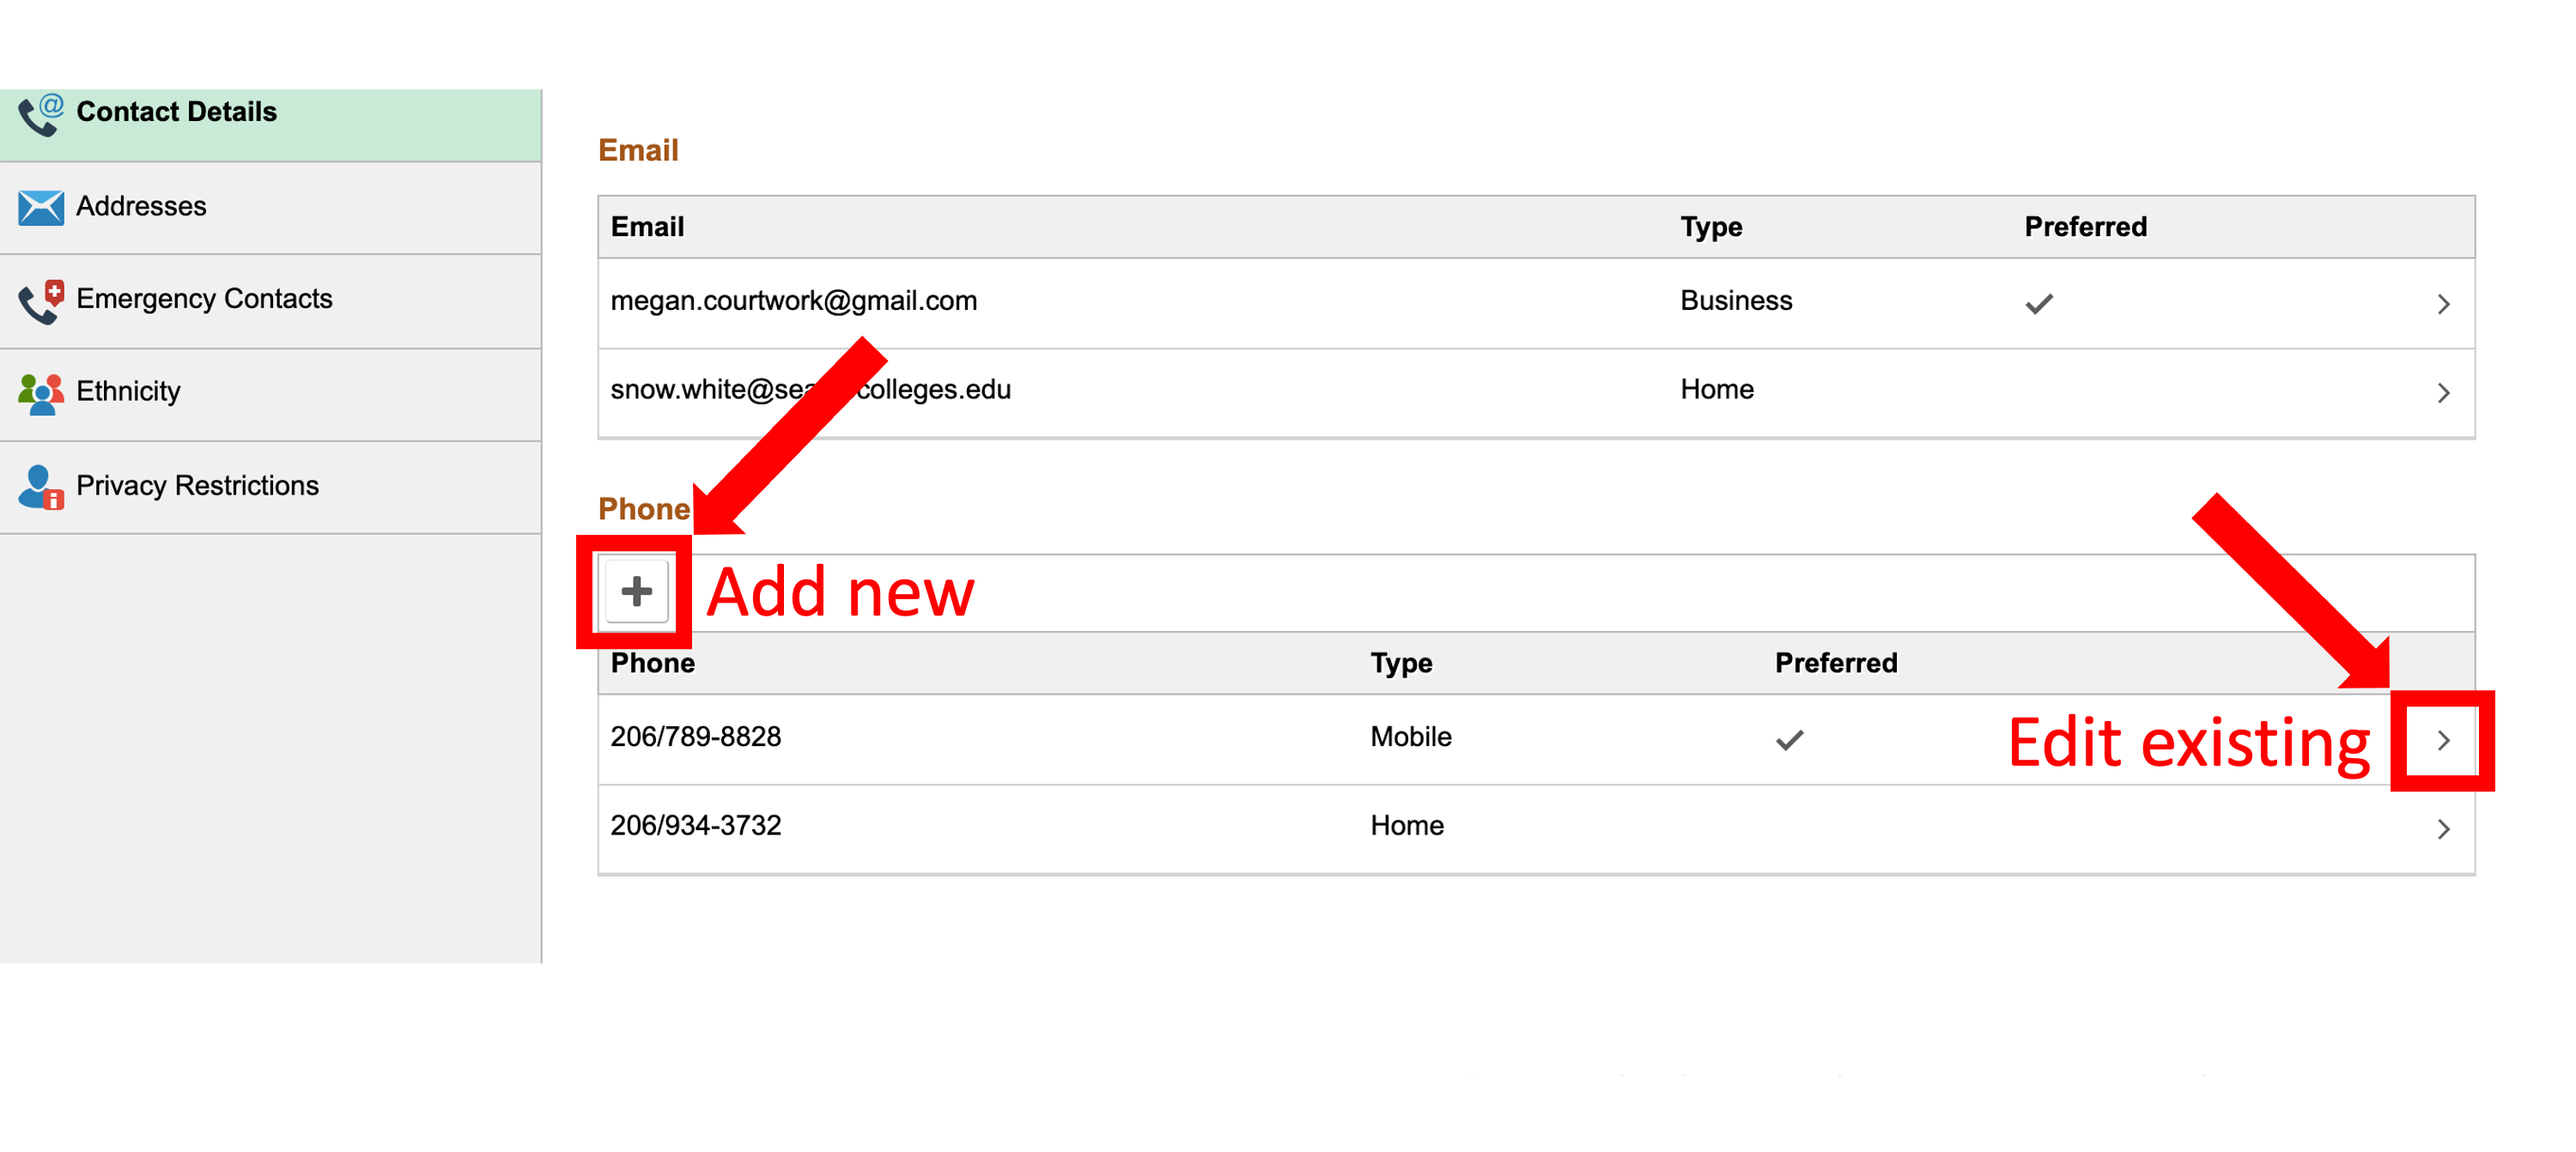
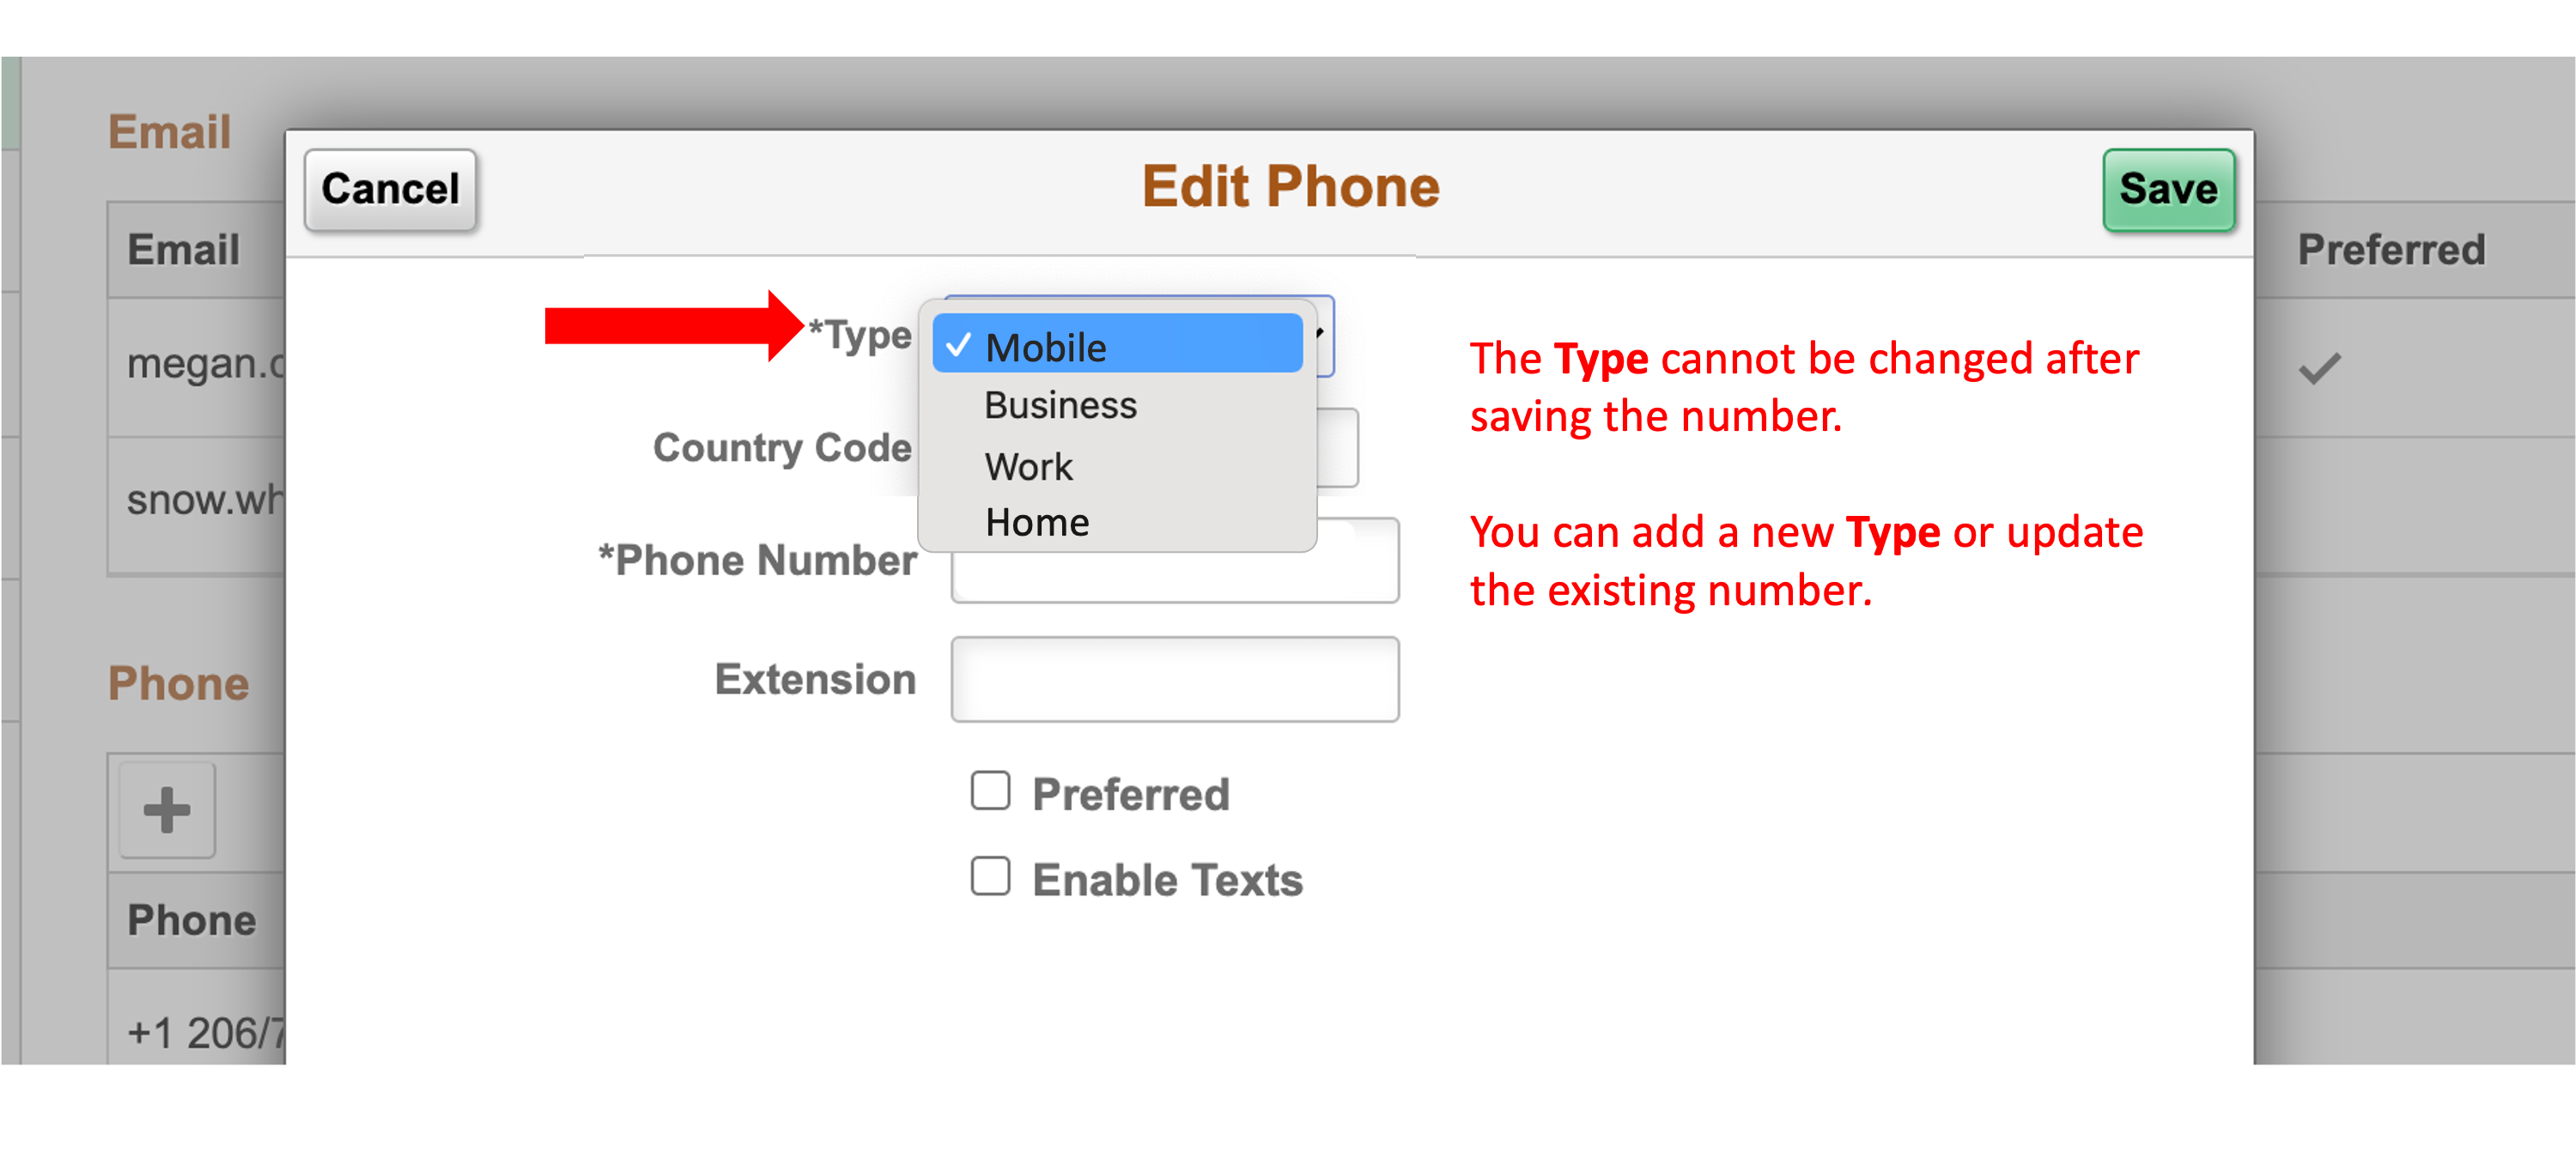
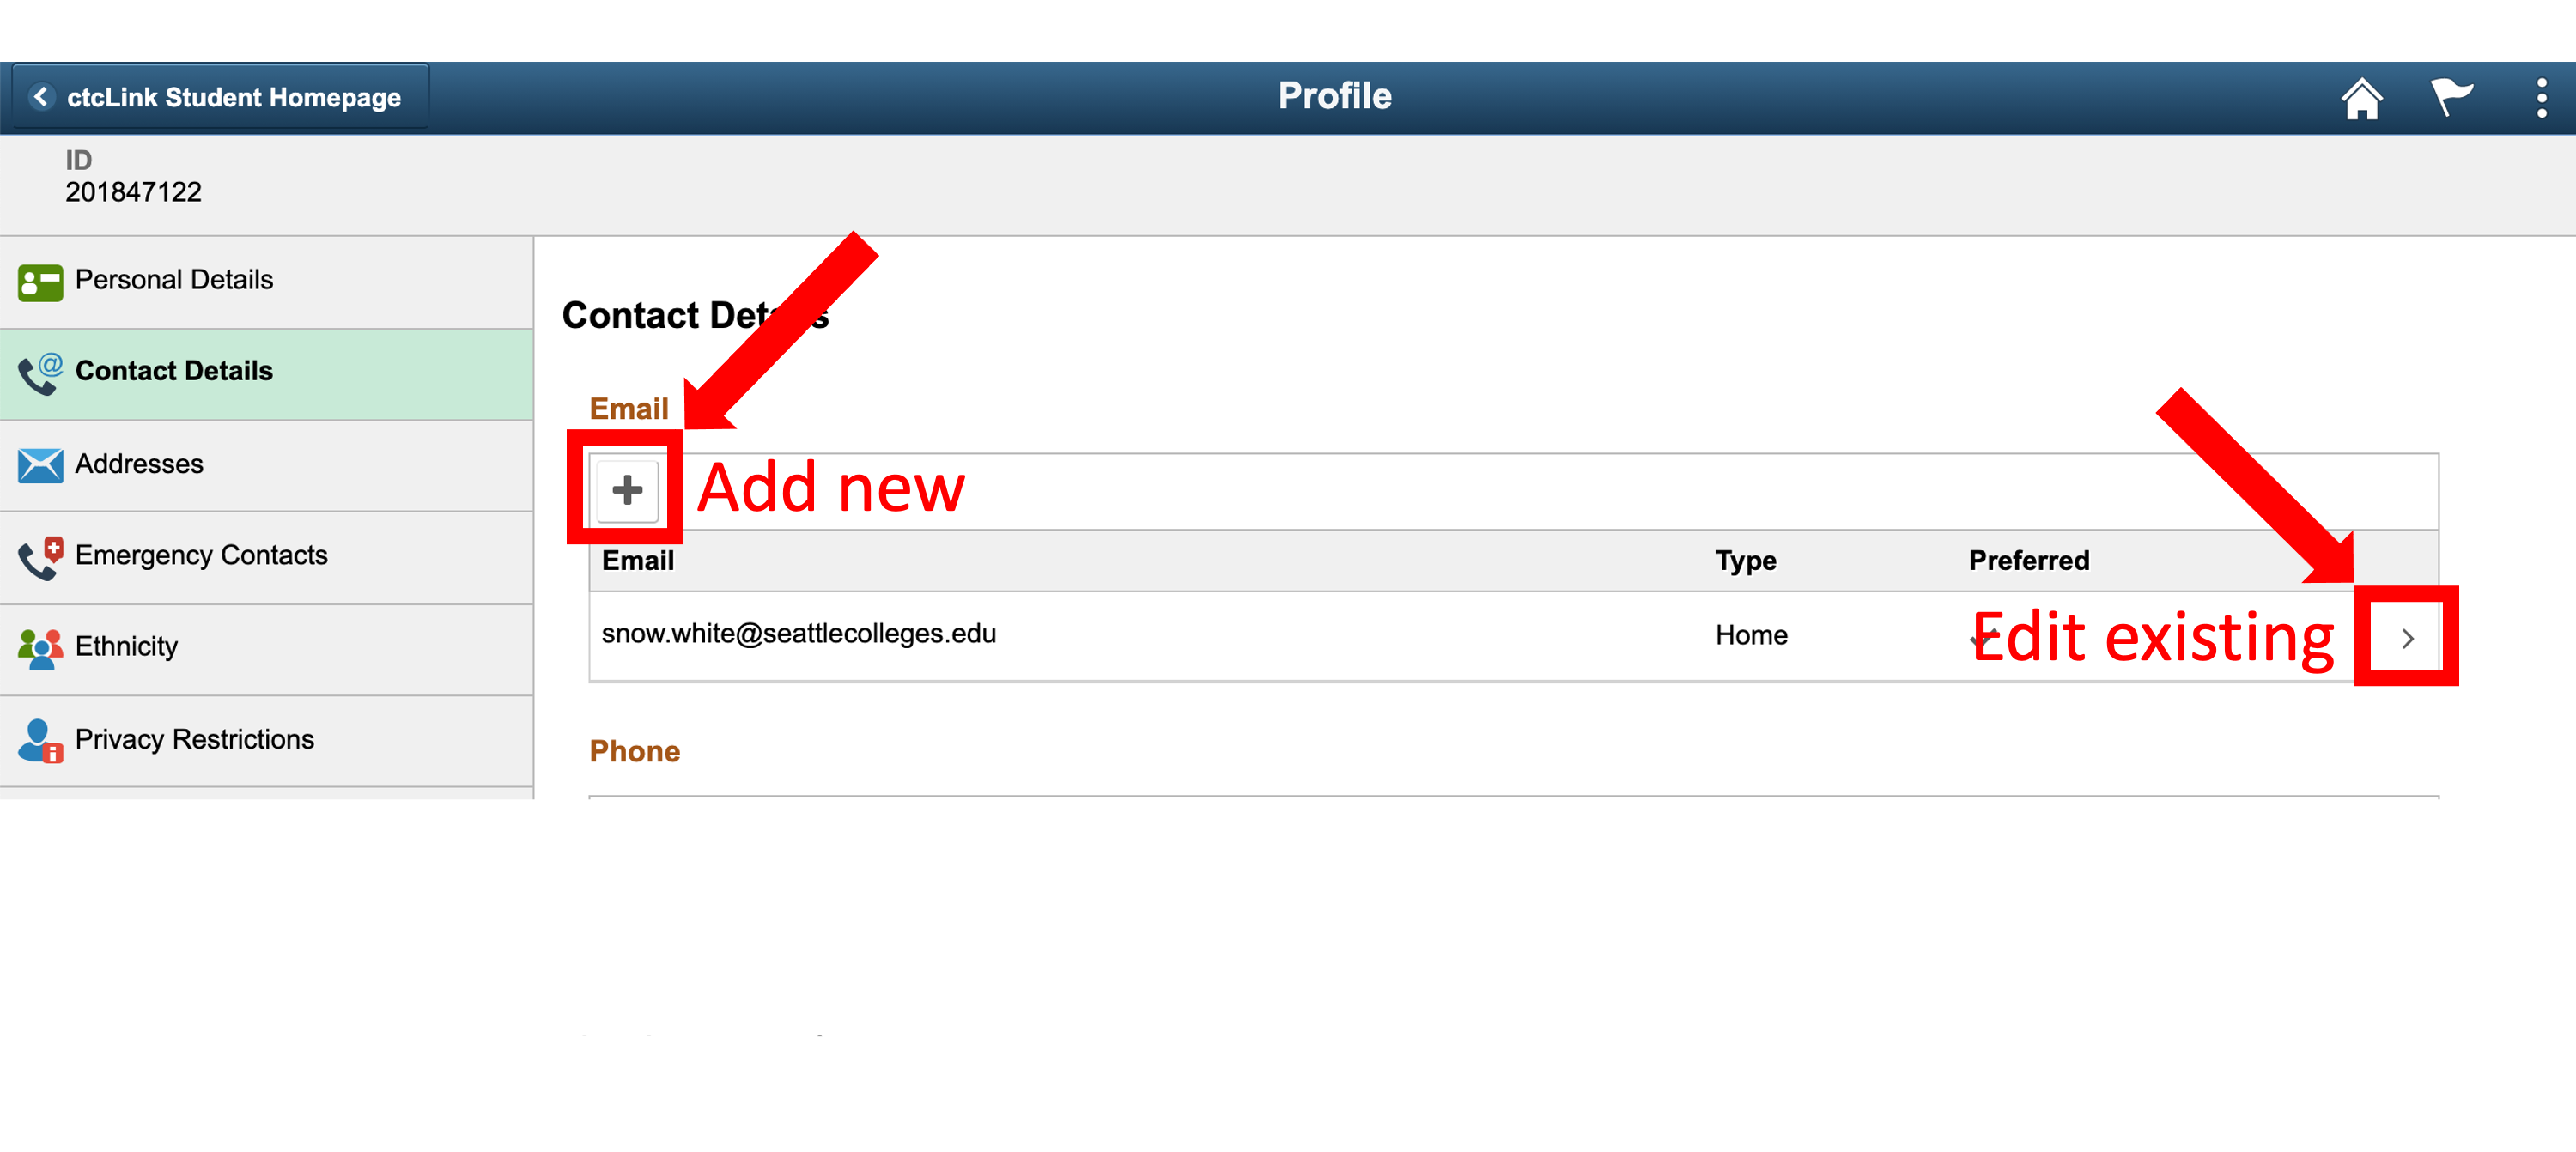
Update your Preferred Contact Details
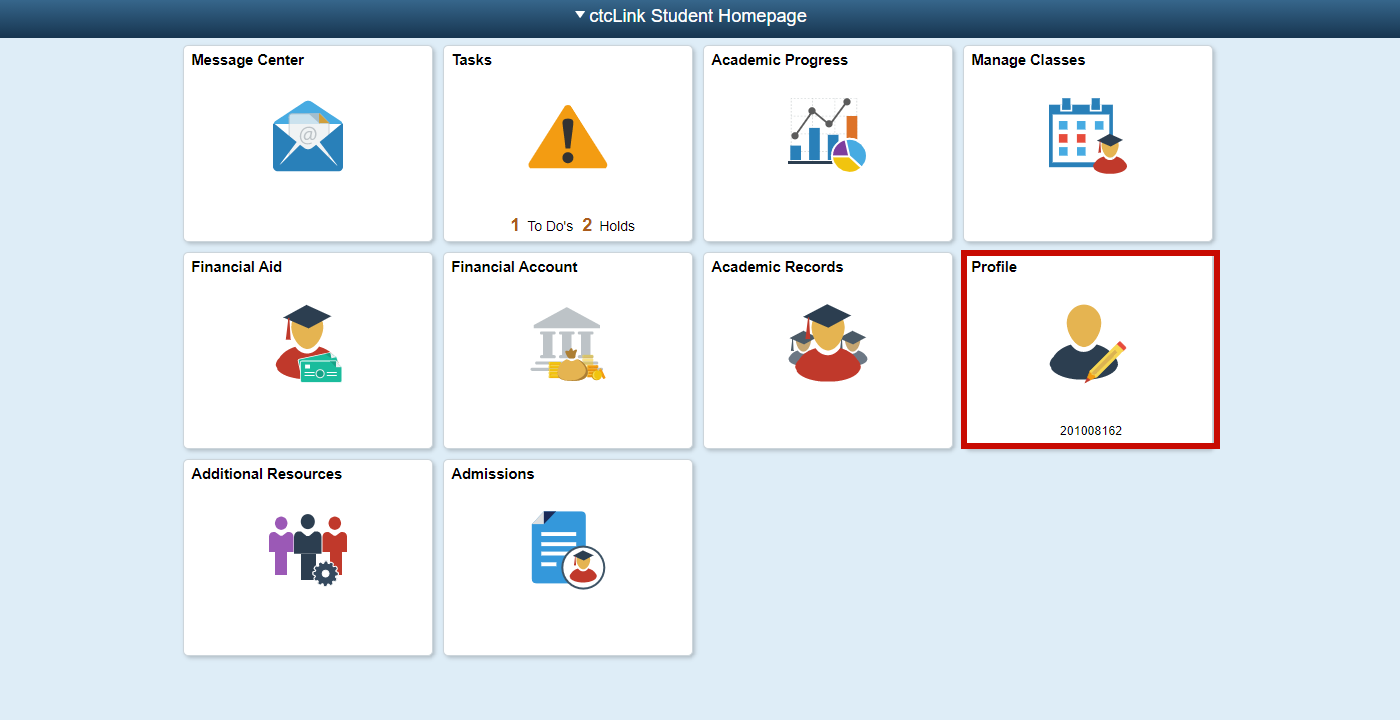
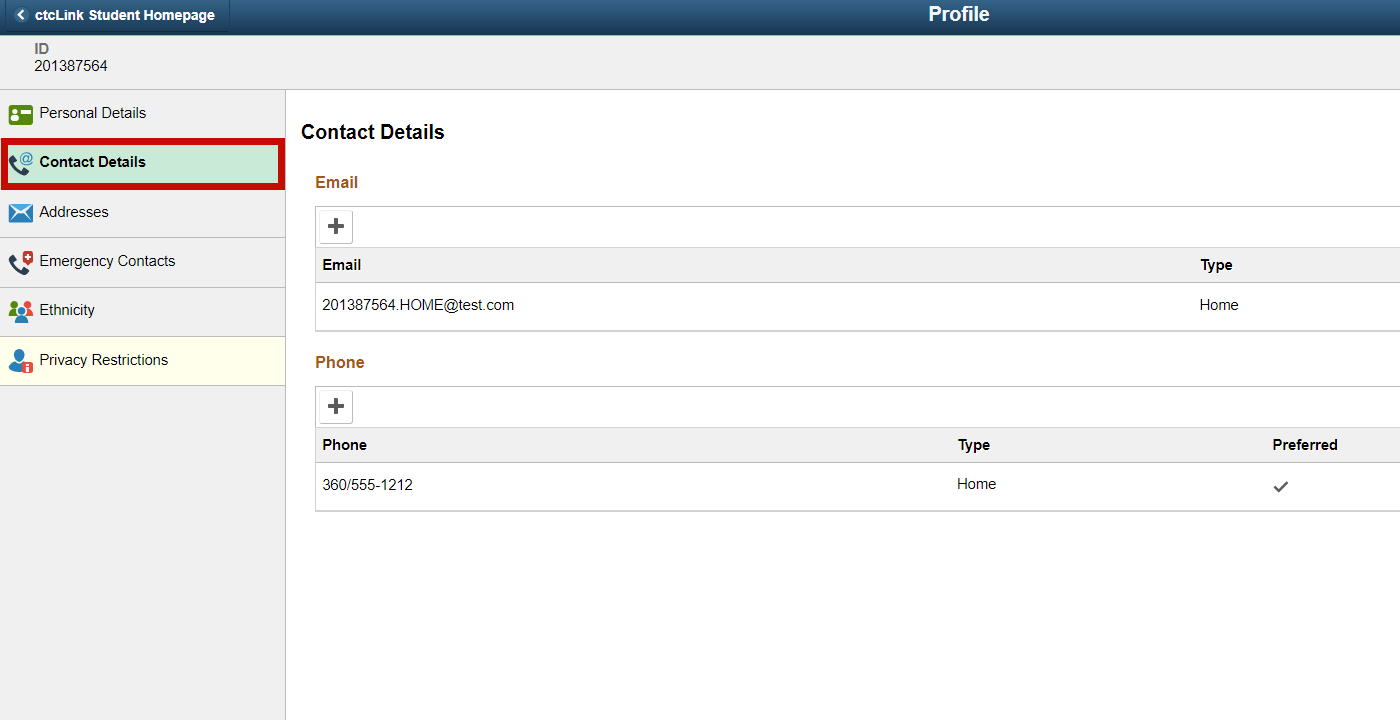
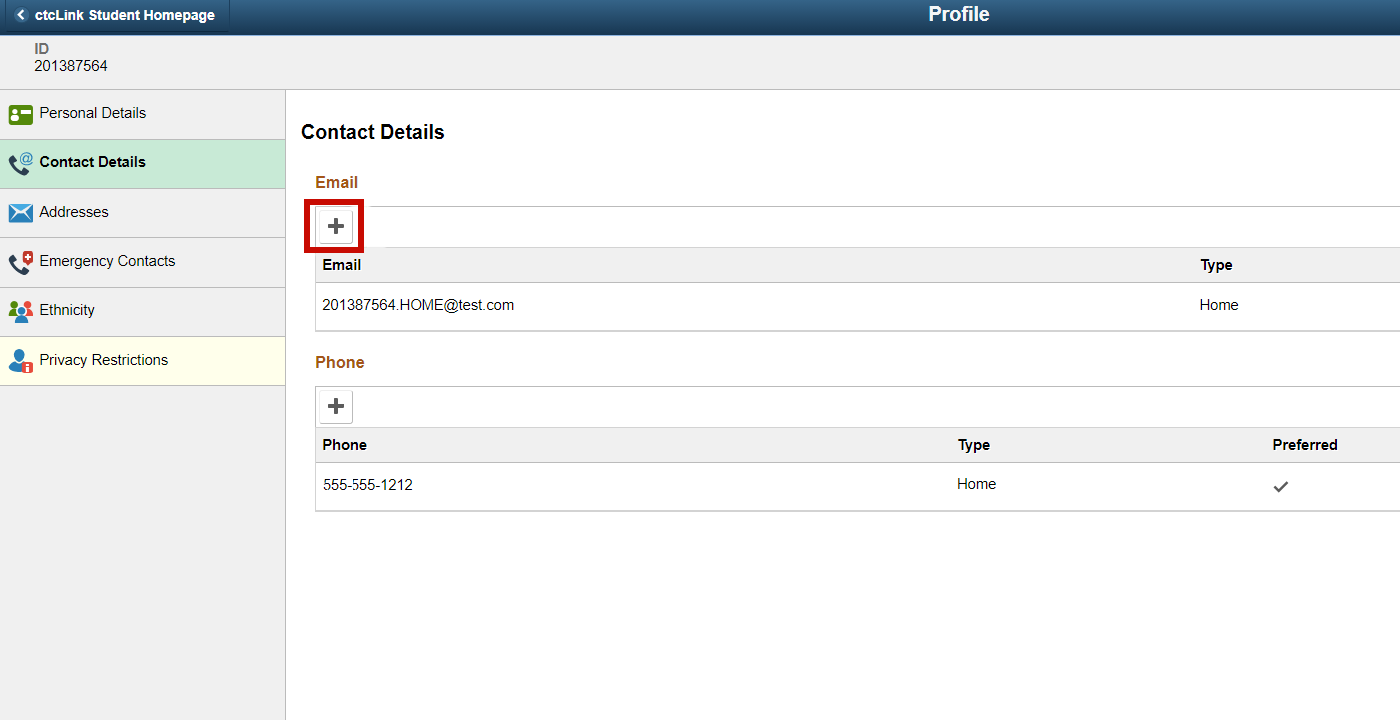
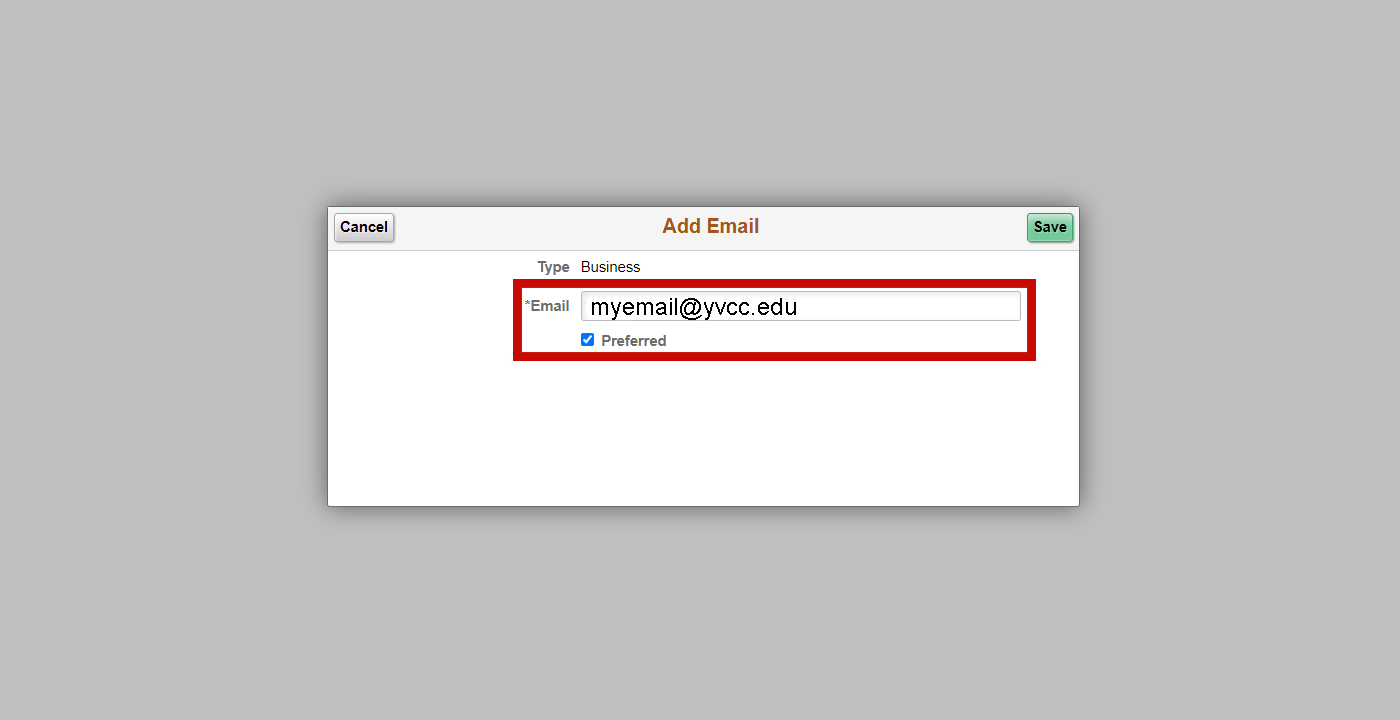
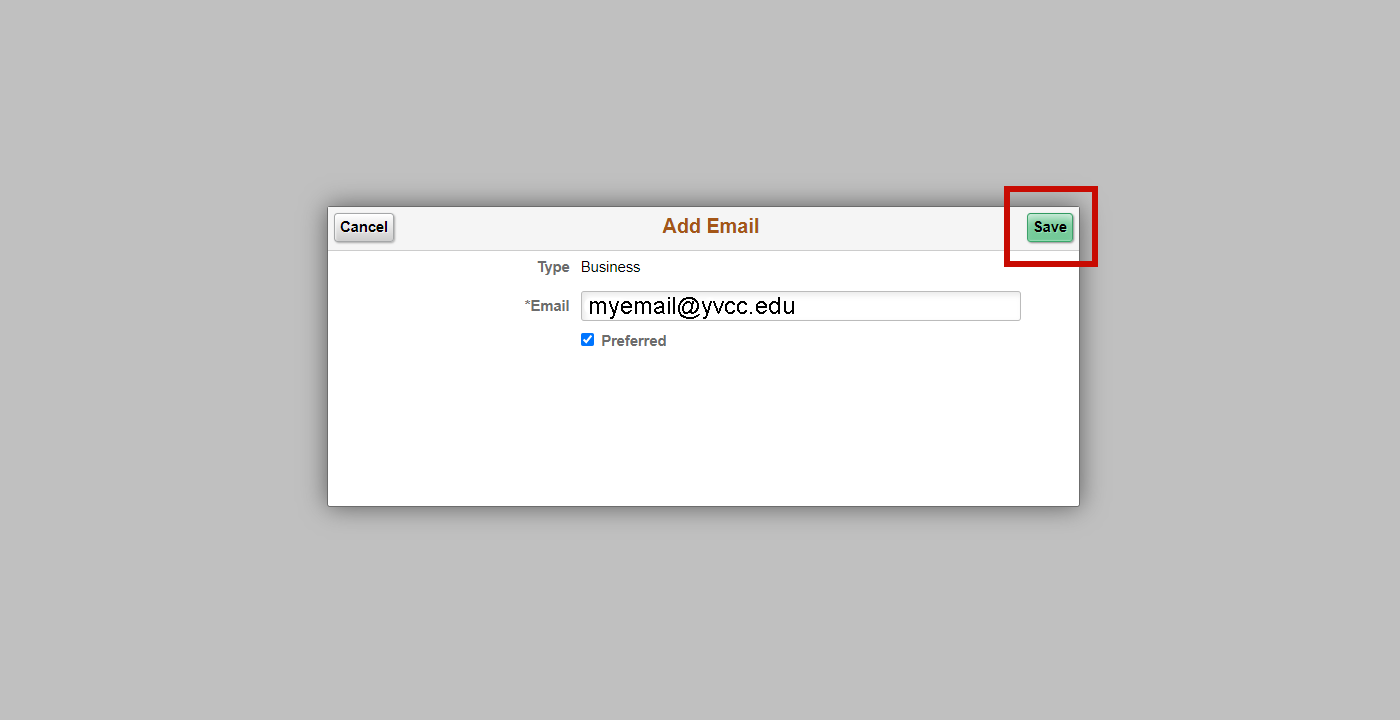
Verify Personal Information
Use the Personal Details tile to view and update personal information such as addresses, phone numbers, emergency contacts, gender identity, sexual orientation, and more.

Account Activation Q&A
Q: How will I get my new ctcLink ID number?
A: For faculty or returning students, you get your new ctcLink ID number (called EMPLID in the system) when you activate your ctcLink account. Be sure to write down your new number when you get it and keep it in a safe place. You can locate your new EMPLID here: Find your ctcLink EMPLID
Q: Will the ctcLink ID number replace my SID?
A: Yes, if you previously had a SID your ctcLink ID number replaces your old SID.
Q: Will my ctcLink password be the same as my Yakima Valley College network login?
A: While this is a possibility for the future, right now employees and students should anticipate having a unique password for the ctcLink system. To log in, use your ctcLink ID number (EMPLID) and a password. The EMPLID replaces your SID.
Q: What if I already have a ctcLink ID number from another college?
A: If you have already received a ctcLink ID number from another college, you do not need to activate your account or receive a new number. The ctcLink ID number you already have is what you will use.
Q: What if I’m an instructor and also a student or staff member?
A: The “applications” you will see in your ctcLink access correspond to your roles at Yakima Valley College. Important note: the contact information you enter through the “Personal Details” tile in Employee Self Service will override the contact information you enter through the “Profile” tile in Student Self Service.
Q: Will new employees be active in ctcLink before their first day?
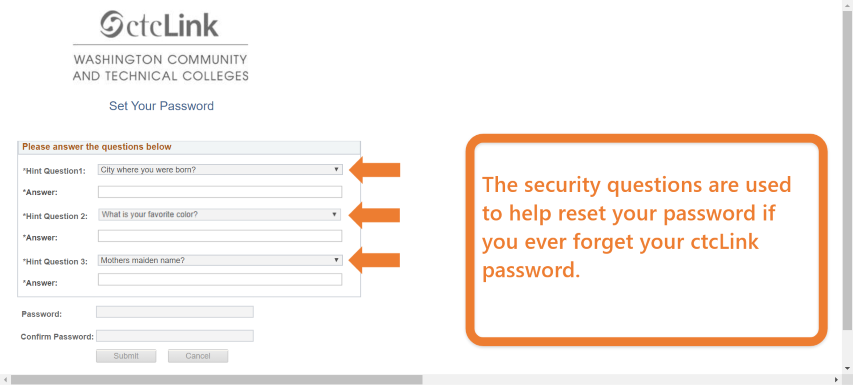
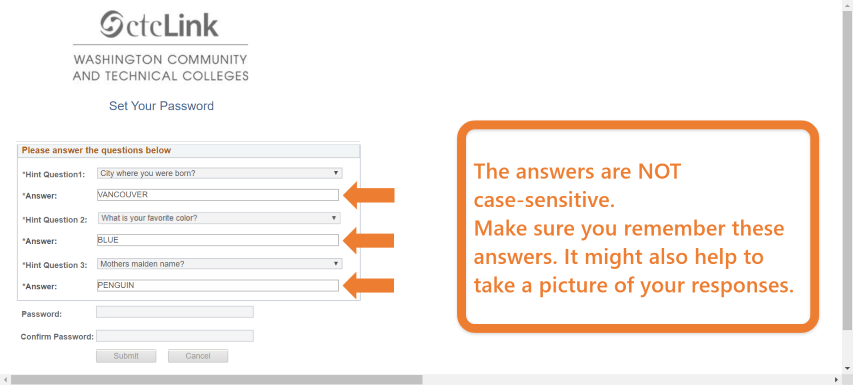
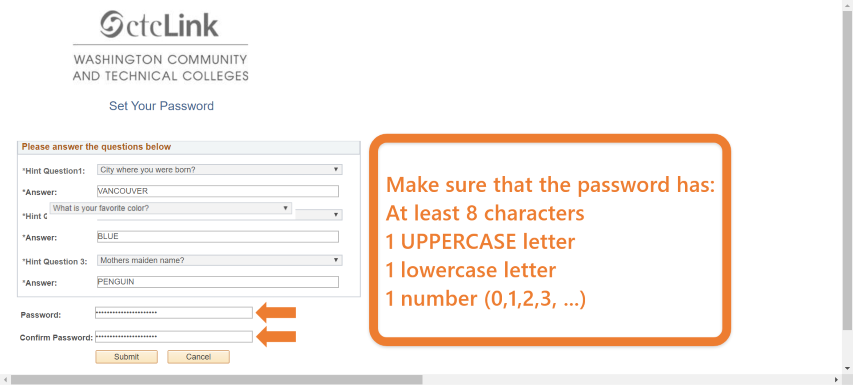
A: Human Resources do most of the set-up for new employees before their first day, but employees themselves must enter key pieces of information (including selecting a password and setting security questions) to activate their ctcLink accounts. For most employees, account activation will occur during the first day on the job.
Manage Your ctcLink Account
ctcLink MobileApp
One exciting feature of ctcLink is an app you can use on your mobile devices. Search the app store (iPhone) or play store (Android) on your mobile device for “ctcLink” to download and install this free app today. After you activate your ctcLink account, you’ll be able to access ctcLink directly through your mobile device using this app.
Note: You must activate your ctcLink account before using the mobile app or its web-based version.
Step-by-step Guide
- On your mobile device, proceed to the App Store (iOS)/Play Store (Android)
- Search for, ‘ctcLink’
- Locate the ctcLink app from the search results. Note: The app publisher is WA SBCTC or WA State Board for Community and Technical Colleges
- Install the app
- Once installed, open the app and choose whether or not you want to allow notifications
- Review the Terms and Conditions. Scroll to the bottom and select Agree
- The list of Institutions will appear. Locate and select Yakima Valley College (you may use the search bar to lookup Yakima Valley College)
- Once Yakima Valley College is selected, you will be brought to the Yakima Valley College ctcLink Homepage. Here, you can access the following:
- Student Portal
- Canvas
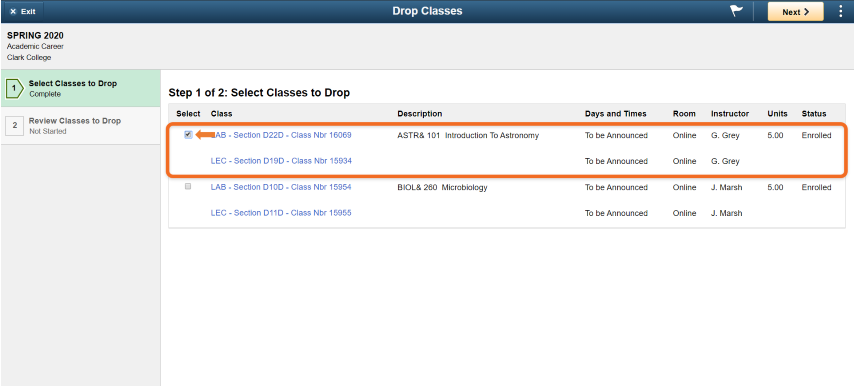
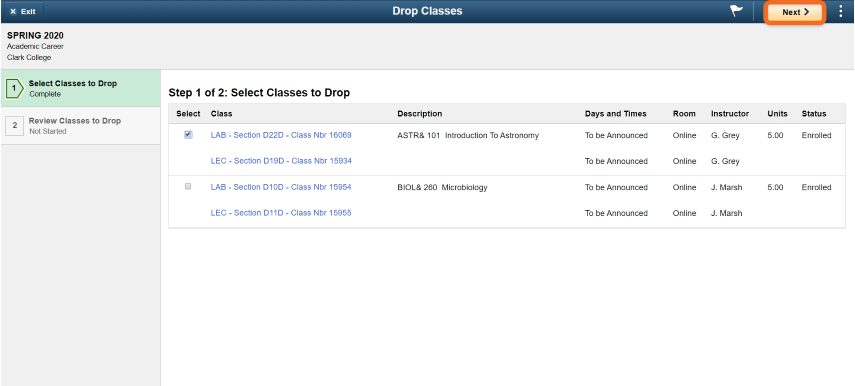
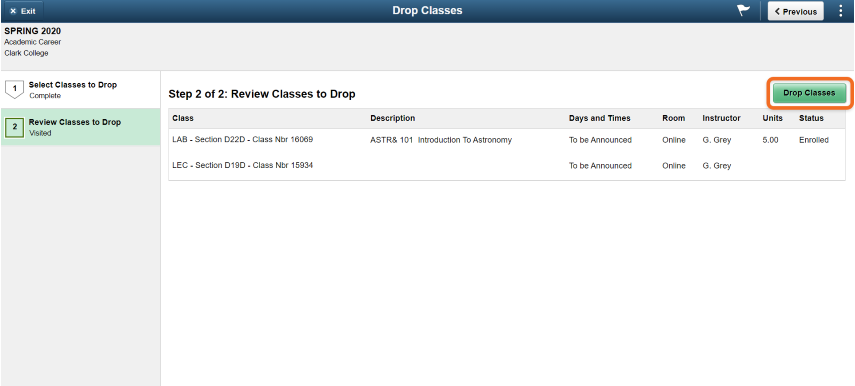
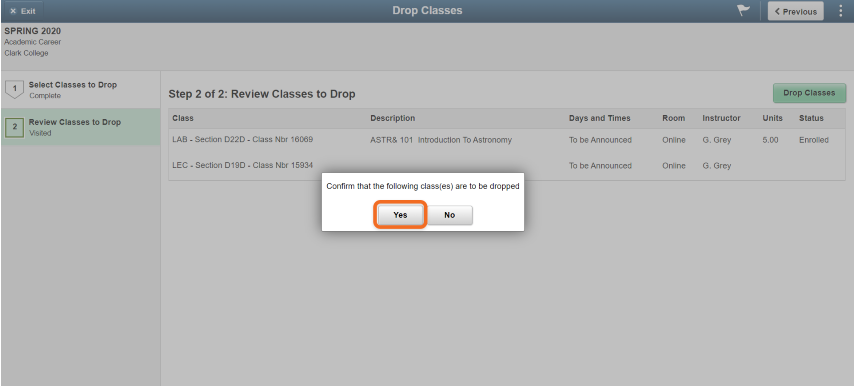
- Class Registration
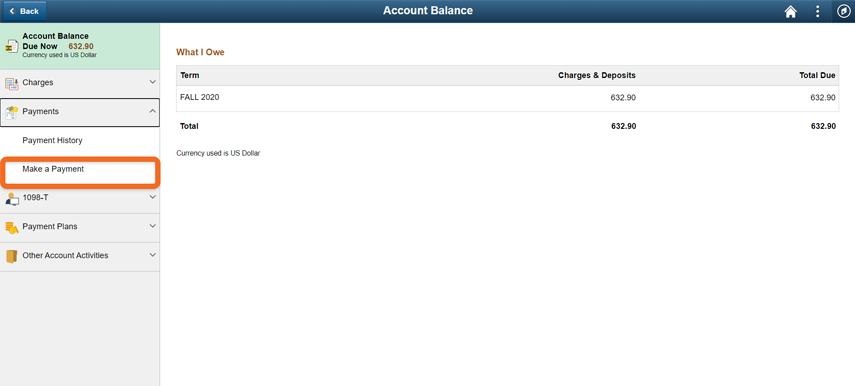
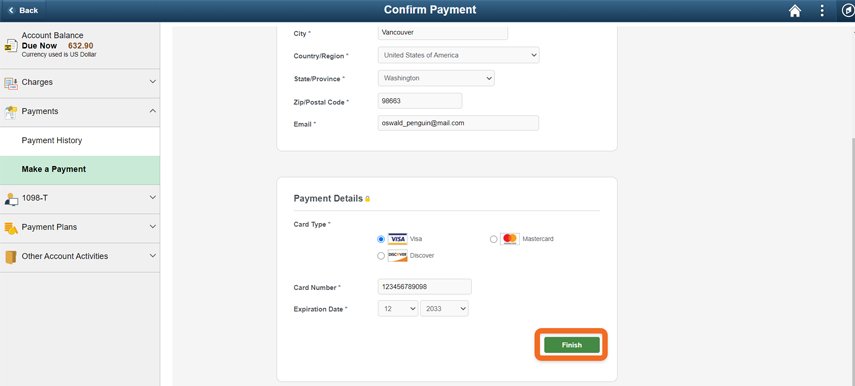
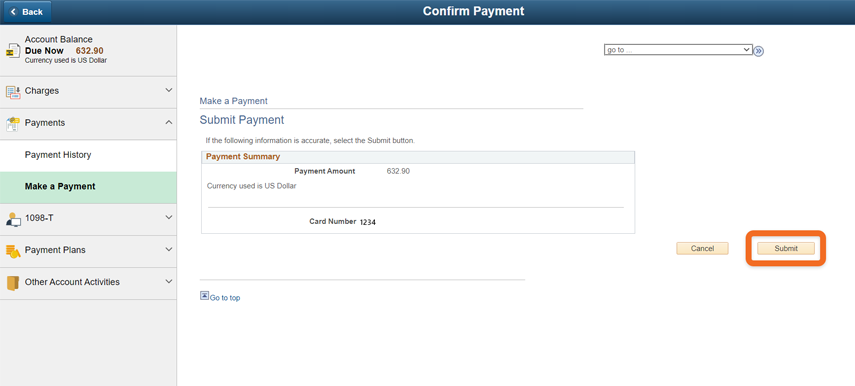
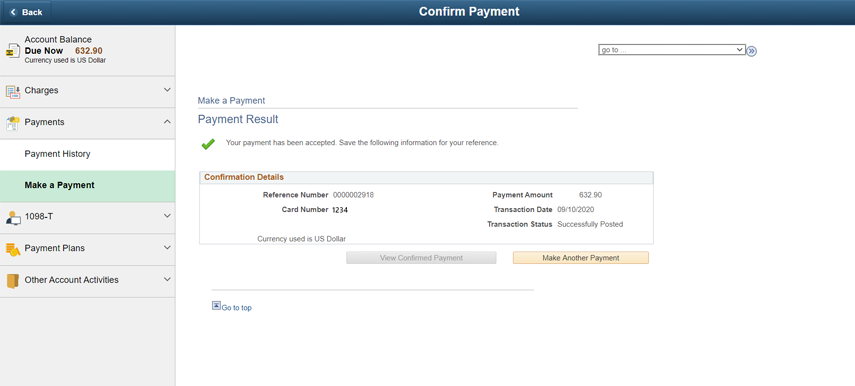
- Tuition Payment
- And more!
A ctcLink mobile app is a good option for people who use screen readers to interact with digital content. If you would rather not download the app, you can use the mobile-friendly website.